With Dashboards you can get dynamically updated data showing your current statistics. You can include the metrics you find most valuable, and see these metrics with the date selection you choose when viewing the dashboard.
If you follow the steps below, you’ll be up and running in no time:
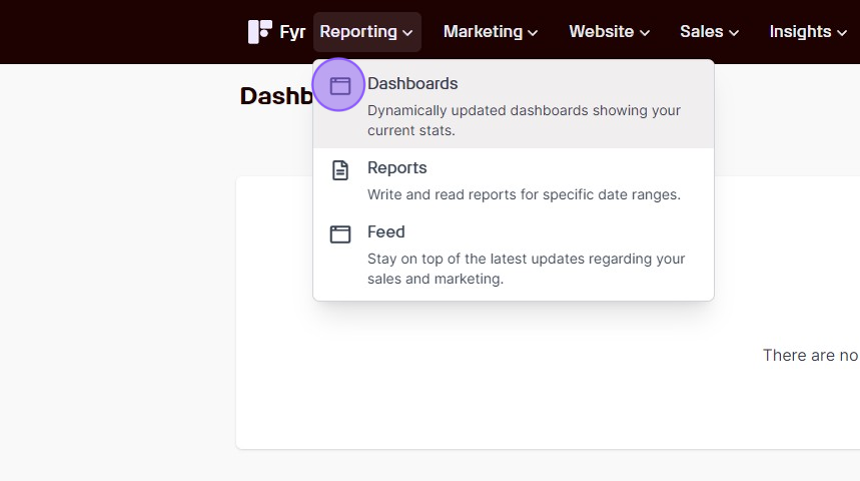
1. Navigate to “Dashboards” via the “Reporting” link in the main menu
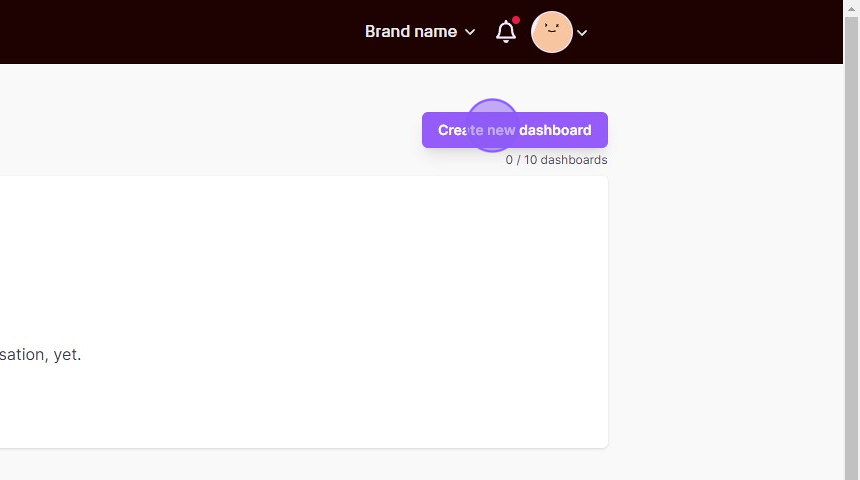
2. Click the “Create new dashboard” button
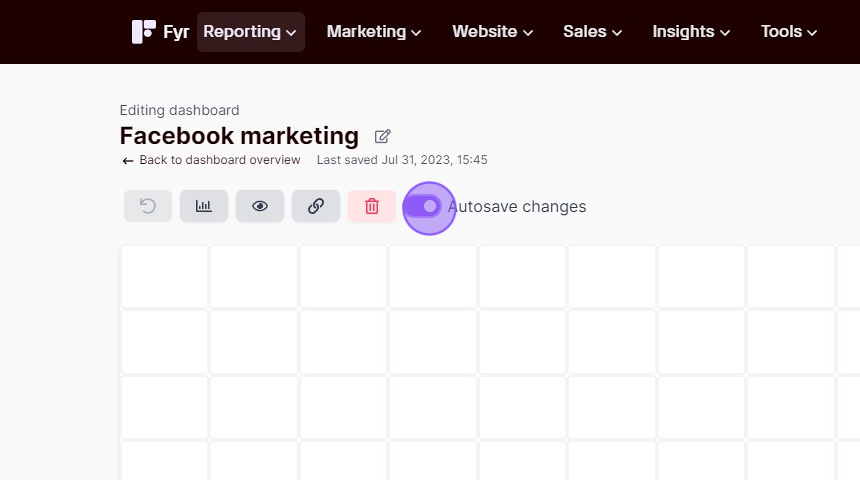
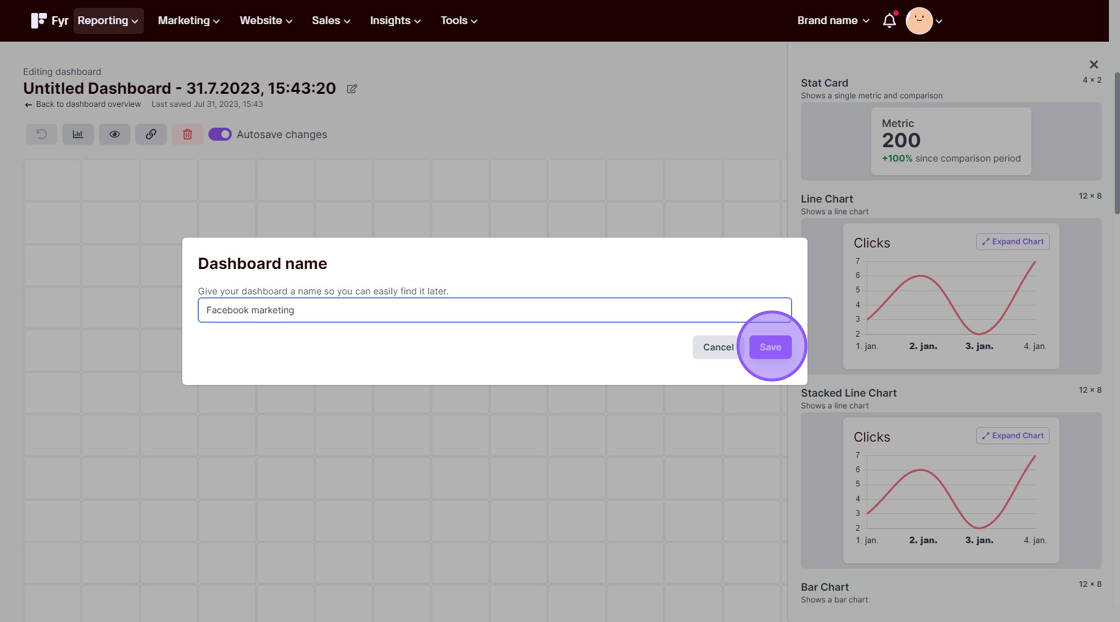
3. You can change the name of your dashboard by clicking the edit icon next to the dashboard name.
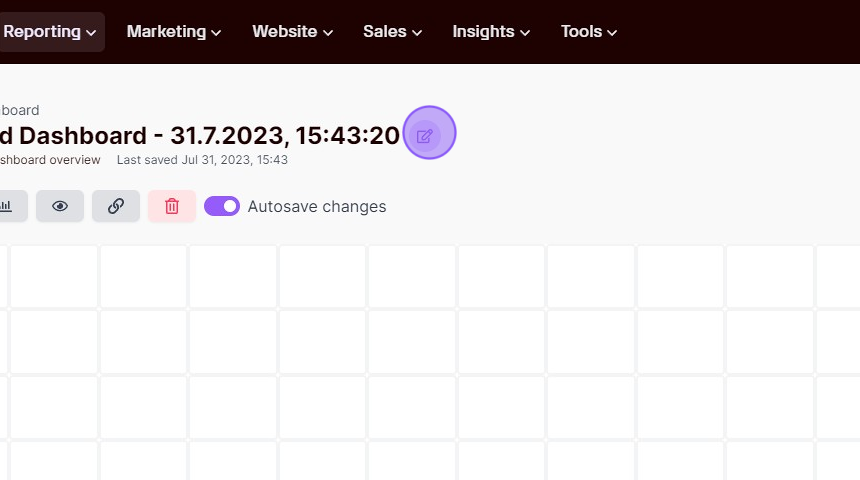
4. Rename and click “Save”.
5. To add a widget to the dashboard, click on the widget you’d like to add and drag it on to the dashboard.
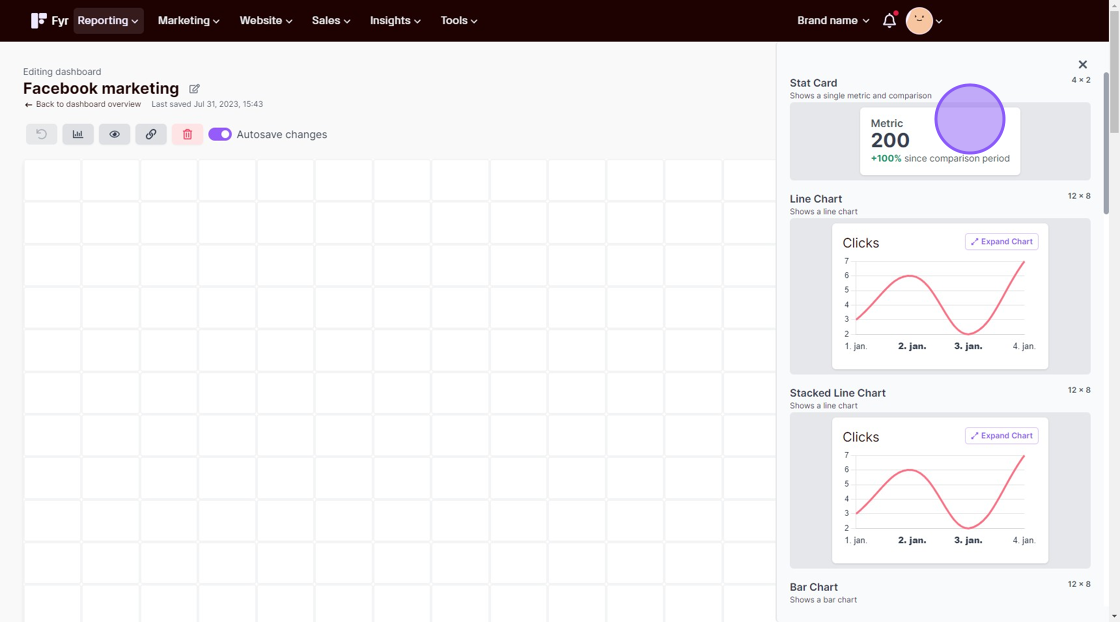
The following steps will vary based on the widget you chose. We’re using “Stat card” as an example.
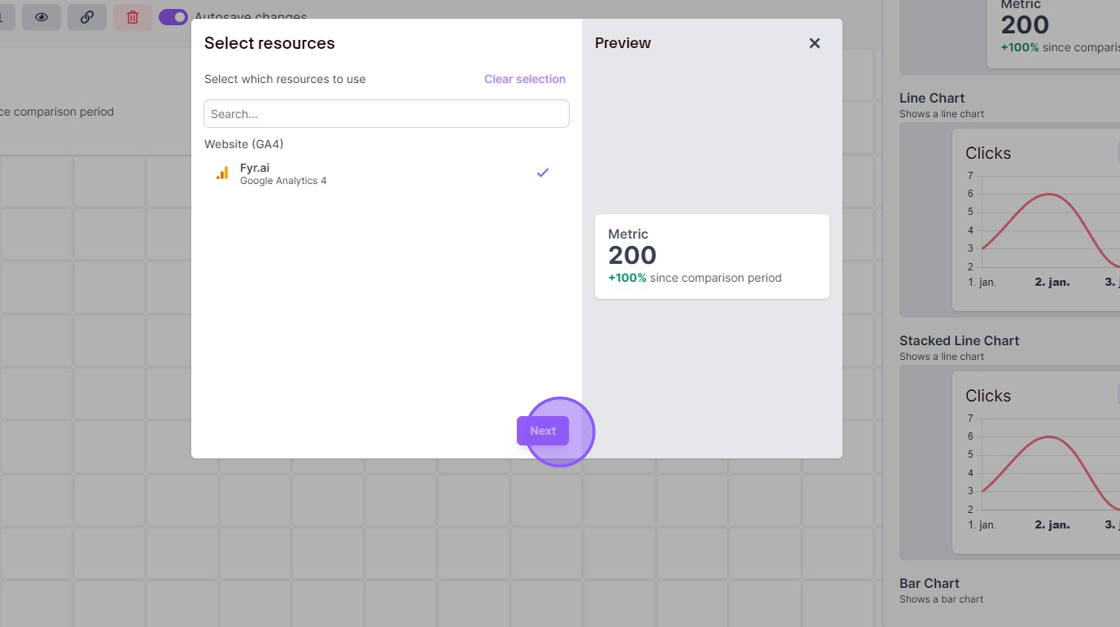
6. Select the platform/resource you’d like to display data from. E.g. Google Analytics 4.
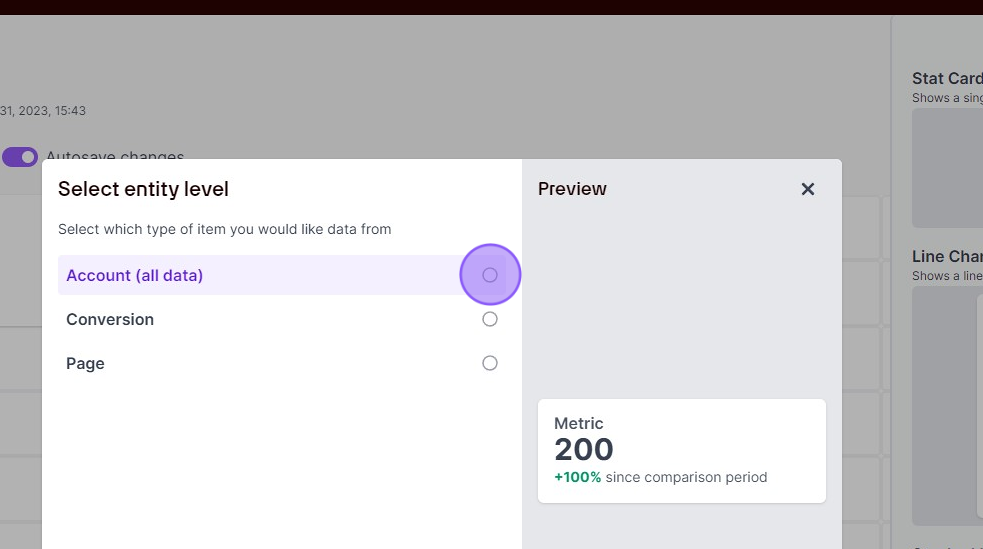
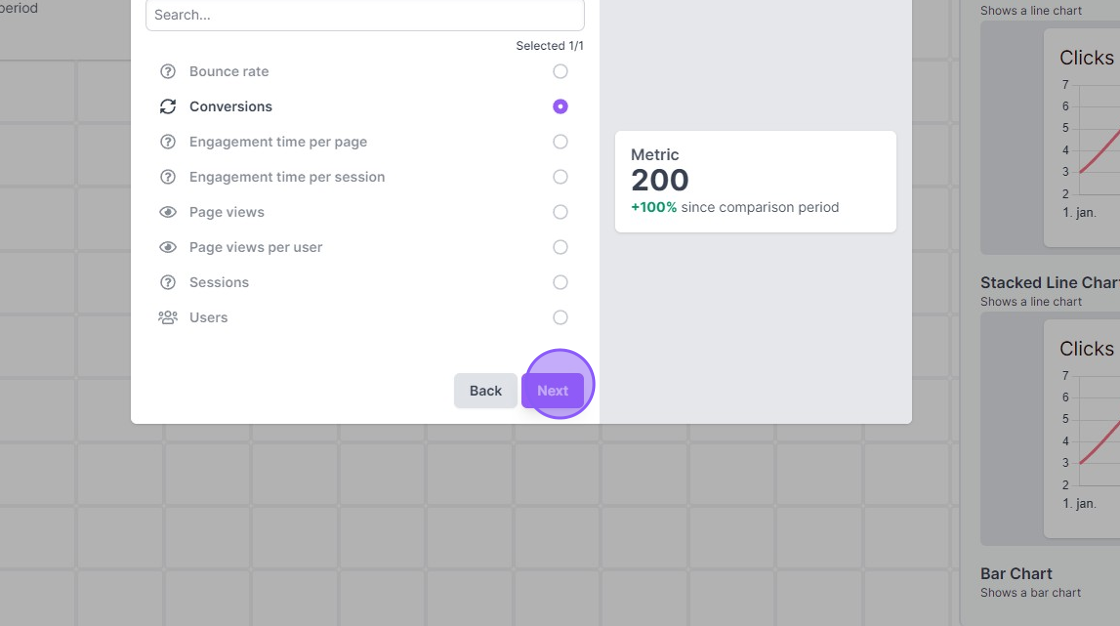
7. Select the entity level. This will vary from platform to platform. In this example you can choose between all data, conversions or page specific data.
8. Select the type of metric you’d like to add to your stat card. E.g. “Conversions”.
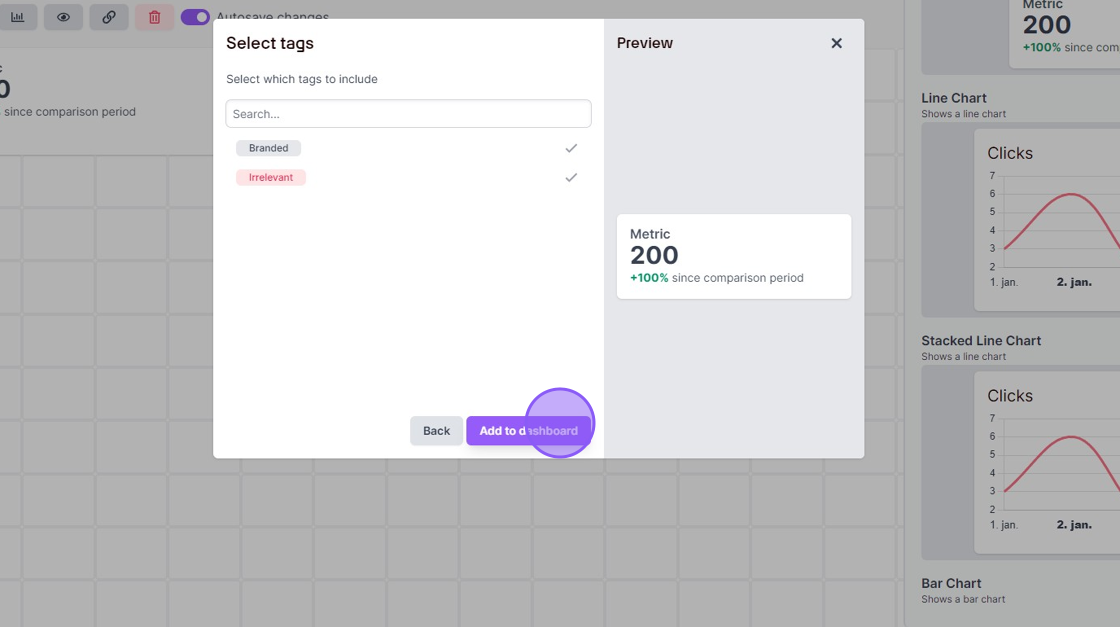
9. Select which tags to include in your data. By default, all tags are included – but you can use tags to filter the data.
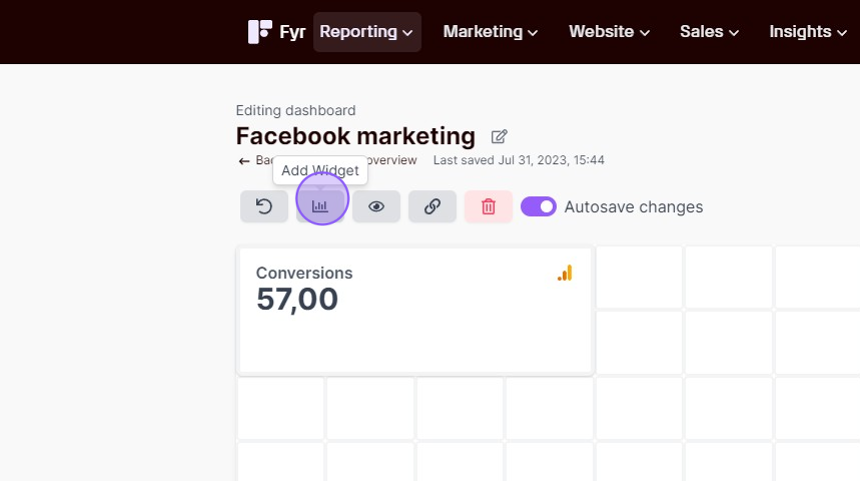
10. You can open up the widget sidebar by clicking the widget button.
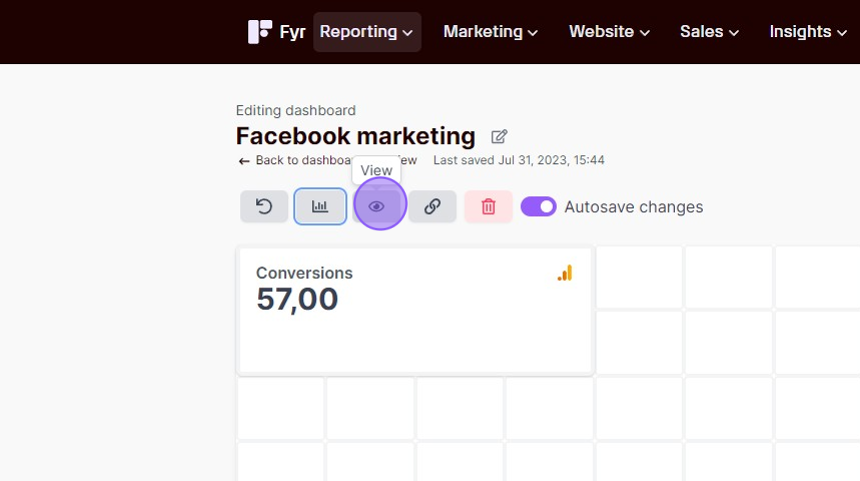
11. If you want to view how the dashboard looks like in view mode, you can do so by clicking the ‘eye’ button.
12. If you like to share your dashboard with others, you can do so by clicking the ‘share’ button.
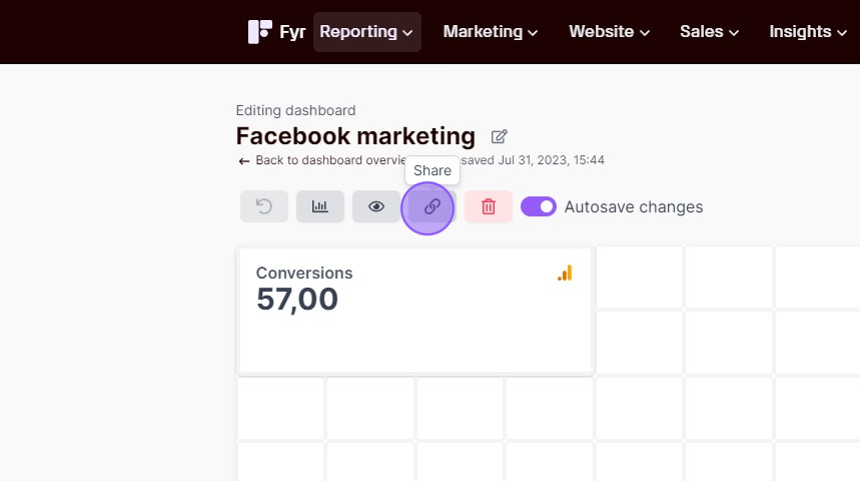
As long as you don’t disable autosaving, the changes you make to the dashboard will automatically be saved to make sure you don’t loose out on setup progress. You can disable autosaving, and manually save your progress if wanted.